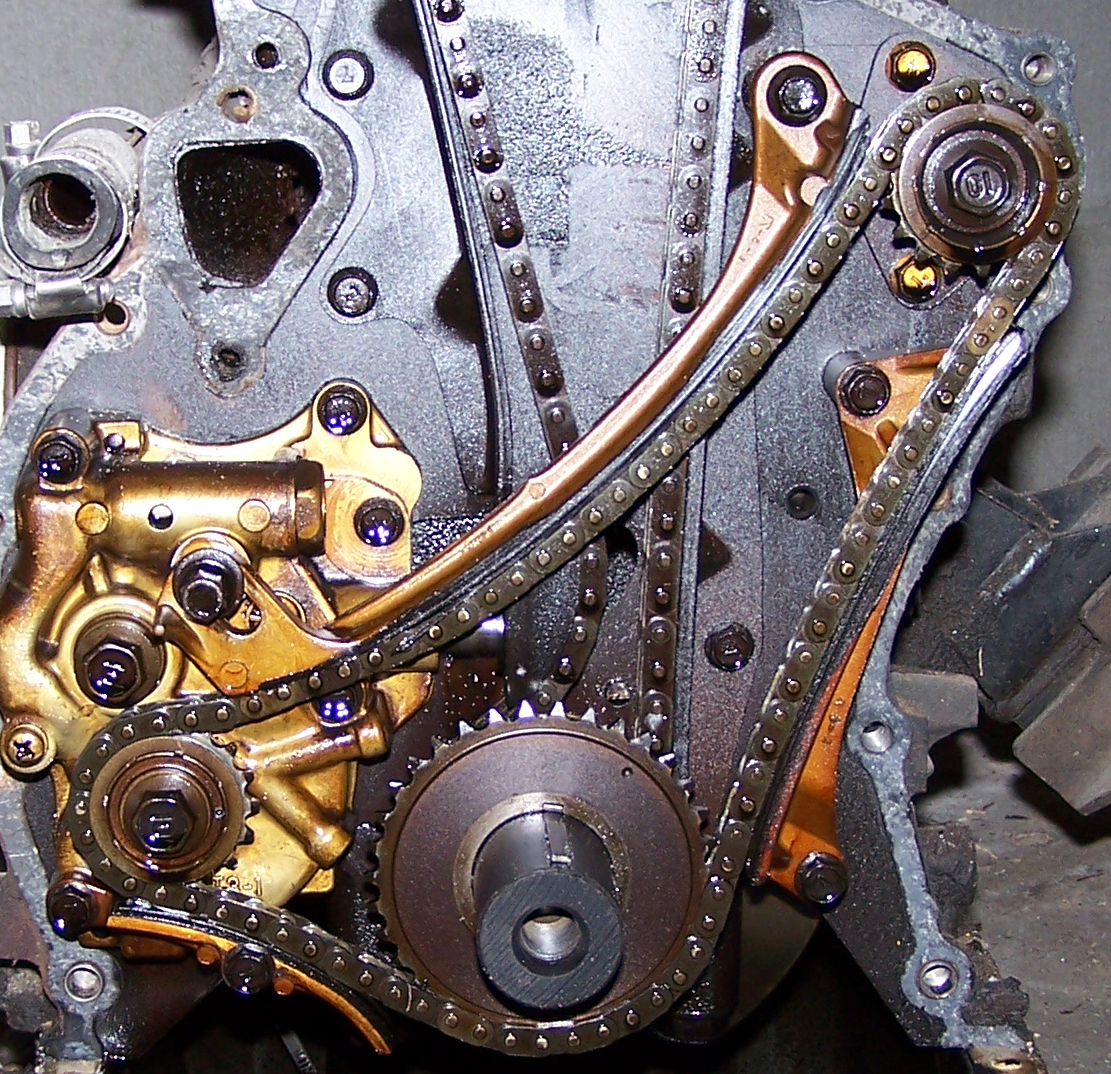
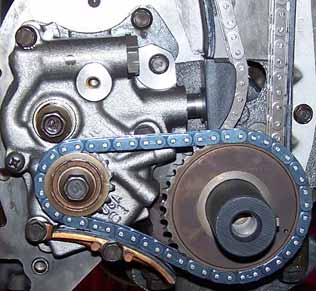
Before and after shots from left to right
|
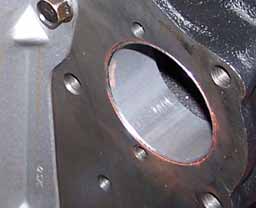
In this article I will be explaining the conversion of removing the two counter balance shafts from the engine. The Mitsubishi Astron engines ran two counter balance shafts, one fitted behind the oil pump (bottom left of photo). The second shaft was fitted higher in the block and off to the right side (top right of photo). The shafts were driven by a single row chain that connected the shafts to the crankshaft and had a manually adjusted tensioner fitted on the top side or slack side of the chain. This tensioner was accessible through a small plate fitted on the timing case which allowed the chain to be kept under tension as it wore out. This was a manual adjustment that was required from time to time. The original crank sprocket and the oil pump sprocket were retained and are now connected by a very short chain as per the photo. The photo below shows the hole where the shaft used to be. By removing these shafts the engine gained horsepower and eliminated the common problem of chain stretch and constant adjustment required of the chain. When I converted my engine, there was no mention of the requirement to re-balance the engine. However I strongly suggest that the engine is re-balanced if going down this conversion route. With that in mind then, this conversion would be suitable during a rebuild of the engine. I rebuilt the engine again a few years later and had it rebalanced then. |
|
|
|
In the kit you will get a bearing sleeve to press into the upper shaft tunnel to block off the oil gallery. A short dummy shaft to fit through the oil pump and the small chain to connect the oil pump to the crankshaft. The original bottom guide rail was retained at the oil pump. You will also receive an oil pump gasket but check it carefully and match it to your existing one. I am unsure and can't remember if timing cover gaskets were included. |
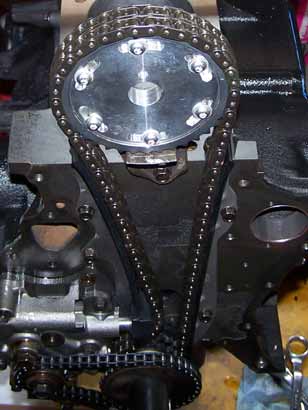
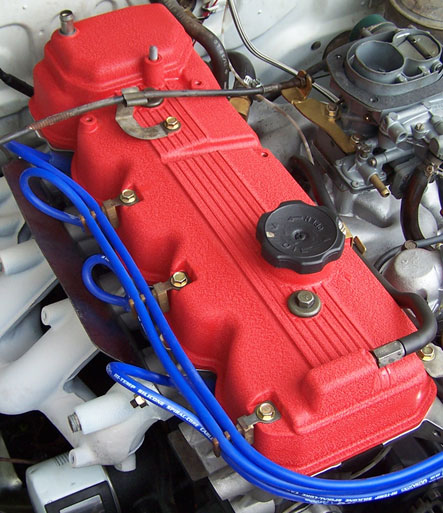
That is about it, very simple conversion to eliminate those pesty balance shafts that were always rattling when they were left un-adjusted or adjusted until the adjuster reached its limit of travel. A lot of the time the counter shaft chain would be over tensioned which would accelerate the wear of the guide rails which resulted in guide rail failure and the associated noise of metal to metal contact. The photo below is just to show off my re-build
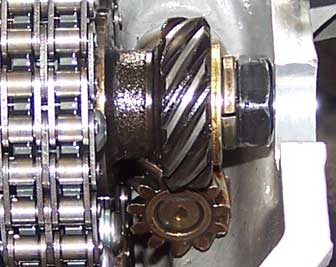
BONUS Content, vernier camshaft gear
As you have seen, I have a vernier gear fitted to my engine. This allows me to advance or retard my camshaft to dial it in to what I want to achieve. ie. I chase fuel economy so I have advanced the camshaft 4deg knowing that my rev range will be low to mid. If I plan a long road trip, I would take the time to retard the cam 4deg to give me better mileage around the 3000 - 3500 rpm range for highway driving. The photo above was the finished product
|
|
I did both these conversions when I re-built the engine. These gears are available from a Mitsubishi performance shop in WA. This link takes you to their website. If you thinking about just breaking the chain link & keeping tension on the chain while you remove & replace the gear, think again. From memory I believe the chain does not have enough clearance between the gear and side of cylinder head to allow the gear to fit in or out. |
|
The left photo shows the distributor drive gear is out of alignment with the centre of the cam gear. The cam gear must be lathed down on the front face that contacts the vernier. Measure how much needs to come off and ensure it is lathed absolutely square. If you don't lathe the gear, you will not be able to time the engine correctly and also the front rubber half moon won't fit in. |
|
 |
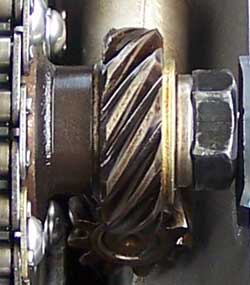
Now fully installed and adjusted to 4deg advance. Look it does lack the feature of scribed degree marks so you can tell at a glance where it is positioned, hey it is what it is. You will just have to degree it in with a degree wheel or degree your harmonic balancer with +4 -4 and of course the notch between them is called straight up but it is also the TDC mark. The pin that you can see in the camgear is the straight up mark. For those that don't know, straight up timing is when pin hole is pointing up, the crank balancer is aligned on TDC and you can draw a straight line from the pin through the centre of the camshaft down through the centre of the crankshaft. If you want to advance it 4 crank degrees you must advance the camshaft by 2 deg. heres a hint: do not turn the engine backwards, you are taking up chain slack against the tensioner and will inevitably get it wrong. |